4 QuickStart for SDK Integration
Step 1: Create new project
Open Unity, create a new project as shown below:

Figure 4.1 Create New Project
Create cube1, cube2, cube3, and configure their Transform information as follows:

Figure 4.2 cube1 Transform

Figure 4.3 cube2 Transform

Figure 4.4 cube3 Transform
Step 2: Import SDK
Choose menu Assets>Import Package>Custom Package…
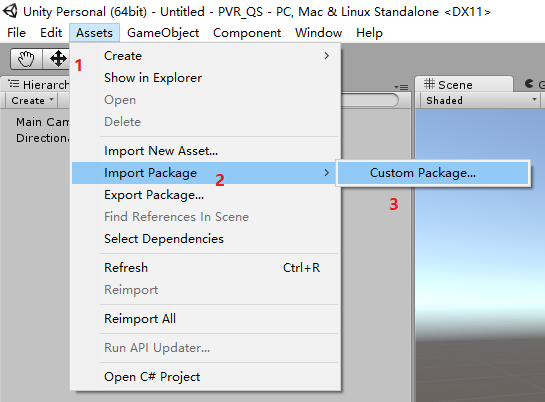
Figure 4.5 Import Custom Package
At this moment, the system will pop up a dialog, choose “PicoVR_Unity_SDK-versionnumber.unitypackage”, and click to open:
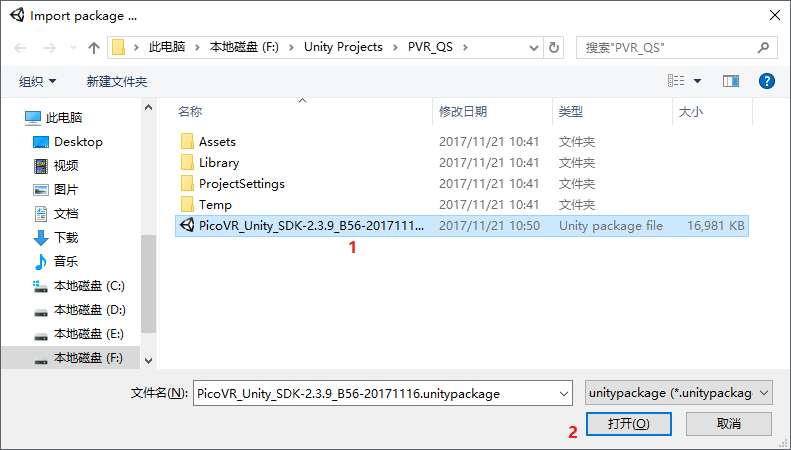
Figure 4.6 Select Unity Package
Once open, the system will pop up another dialog. Please import the corresponding sections according to your needs:
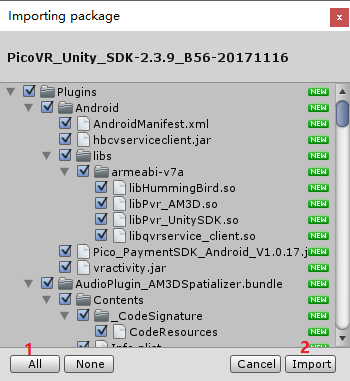
Figure 4.7 Import Options
Step 3: Use SDK
Go to Project tab, expand Assets>Pvr_UnitySDK>Prefabs in turn, drag Pvr_UnitySDK prefab into the scene and set the Position and Rotation of its Transform component to (0, 0, 0):
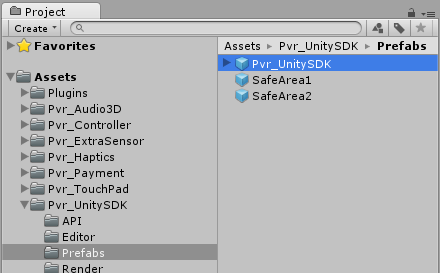
Figure 4.8 Directory for Pvr_UnitySDK Prefab
With Unity Prefab, the hierarchy of the scene should look like the following figure:
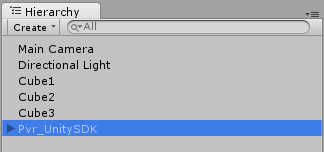
Figure 4.9 Scene Hierarchy
In order to avoid that other cameras in the scene interfere with the stereo rendering of the SDK, the last step is to delete the Main Camera shown in the above figure.
Step 4: Mock Run
Click on the Run button and you can see the screen below in the Game window:

Figure 4.10 Run Simulation
Press and hold Alt , then move the mouse, the screen will follow your mouse to rotate up, down, left and right; Press and hold Alt + click the left mouse button to select VR mode or Mono mode (Unity Editor only).
Step 5: Packaging
Before packaging, you still need to set the tracking type for head and hand according to your current platform: Go to the Inspector panel of Pvr_UnitySDK, if the current target platform is not Pico Neo, you’ll need to set the Head Pose property of Pvr_Unity SDK Manager component to “Three Dof”and Hand Pose to “Three Pose”:

Figure 4.11 Adapting Target Platform
Save your current scene before packaging, the go to File>Build Settings…, click “Add Current”to add current scene to the build list. Then select Android in Platform field, then click “Switch Platform”, and finally click Build to complete packaging.

Figure 4.12 Packaging
Till now, a complete SDK usage process is complete. The specific SDK adaptation methods for various Pico VR hardware will be given in detail in the following sections.