5 Hardware Product Development Guide
This section will describe how to use SDK on the various Pico hardware products. Developers can choose to read the corresponding content accordingly.
5.1 Pico Goblin & Pico U
5.1.1 Implementing Head Tracking and Stereo Rendering
The implementation of head tracking is consistent with the previous SDK QuickStart, just to put Pvr_UnitySDK prefab to the scene. However, there is one thing to note that when Pvr_UnitySDK prefab is placed into the scene, expand it and switch to its details panel:
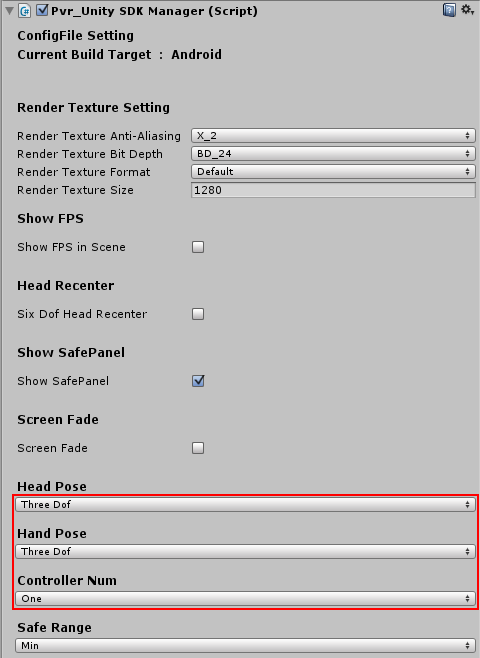
Figure 5.1 Switch Tracking Options for Pico Goblin
Make sure that Pvr_Unity SDK Manager components have the following attributes: Head Pose: Three Dof; Hand Pose: Three Dof; Controller Num: One.
5.1.2 Using 3dof Controller Prefab
Pico 3dof Controller currently supports Pico Goblin and Pico U two devices. Please follow the steps below to use Pico 3dof Controller:
- Expand Assets> Pvr_Controller> Prefabs, place Goblin_Controller prefab into the scene as the child Game Object of Pvr_UnitySDK at the same level as Head.
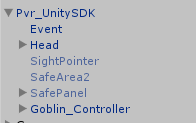
Figure 5.2 Goblin_ControllerPrefab Drag&Drop Location
- Expand Assets> Pvr_Controller> Prefabs, place ControllerManager into the scene, then attach Goblin_Controller to the Pvr_Controller script of ControllerManager and attach the toast in Goblin_Controller to the Pvr_ControllerManager script.
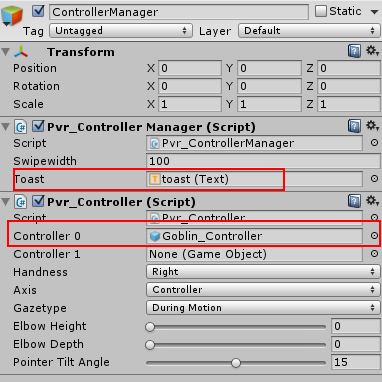
Figure 5.3 Configure ControllerManager
5.1.3 Using the keys and touchpad of 3dof controllers
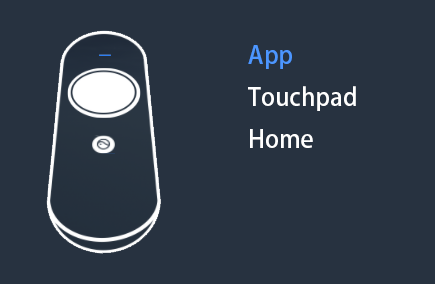
To use the keys and touchpad of 3dof controllers, it’s necessary to call controller related interfaces. For specific interfaces, please refer to section 6.3 in Chapter 6 Overview of API Functions. Here we’ll explain the corresponding relationship between the parameters of the following interfaces and the physical controller keys.
First about the keys, and the correspondence of the keys and API functions are as follows:
Table 5.1 the Correspondence of Physical Controller Keys and API Function Parameters
| Buttons | KeyCodes |
|---|---|
 |
Pvr_KeyCode.APP |
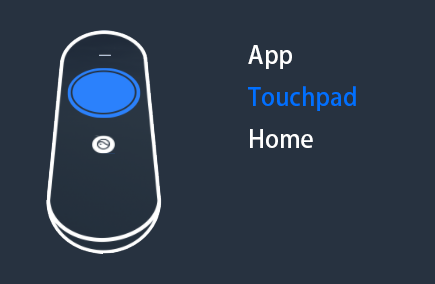 |
Pvr_KeyCode.TOUCHPAD |
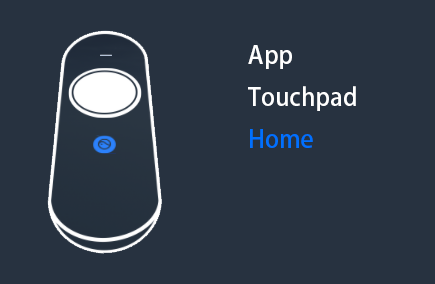 |
Pvr_KeyCode.HOME |
 |
Pvr_KeyCode.VOLUMEUP |
 |
Pvr_KeyCode.VOLUMEDOWN |
And then the touchpad, and the touchpad diagram is as follows:
Touchpad Diagram
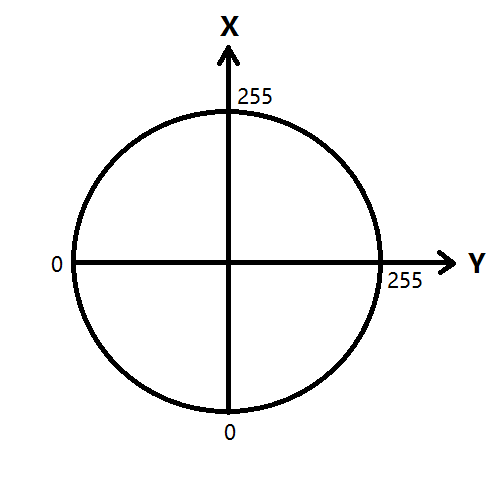
Figure 5.4 Touchpad Diagram
Note: The swipe function of the controller determines the end of the swipe only when the finger is lifted.
5.1.4 Using the Goblin HMD Keys
Goblin HMD Keys are illustrated below:
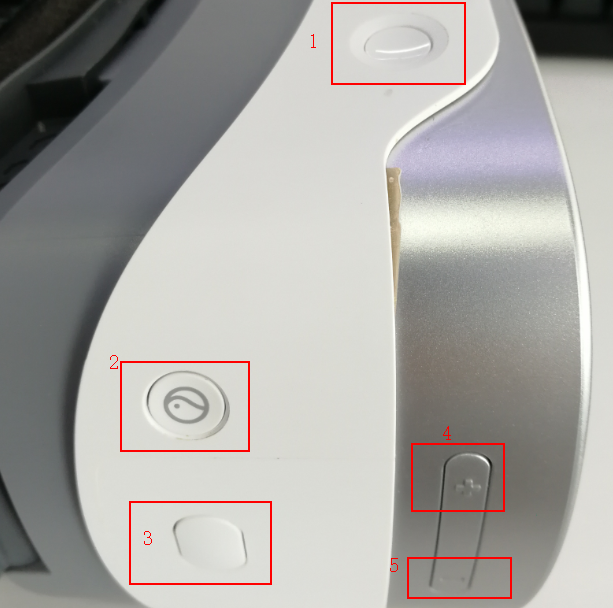
Figure 5.5 Goblin HMD Keys
The corresponding relationship between physical keys and Unity input keys are as follows:
Table 5.2 the Correspondence between RGoblin HMD Keys and Unity Input Keys
| Goblin HMD Keys | Unity Input Keys |
|---|---|
| Key 1 | Power Button — System occupied |
| Key 2 | Home Key — System occupied |
| Key 3 | JoystickButton0 |
| Key 4 | Volume+ |
| Key 5 | Volume- |
5.2 Pico Neo DK/ DKS
5.2.1 Implementing Head Tracking and Stereo Rendering
The implementation of head tracking and stereo rendering with Pico Neo DK/ DKS is the same as Pico Goblin and this will not be repeated here.
5.2.2 Enabling Pose Tracking with Split Controllers
Pico Neo DK/DKS split controller is illustrated below:

Figure 5.6 Pico Neo DK/DKS Split Controller
If you want to use the pose tracking of split controllers, please expand Assets> Pvr_ExtraSensor> Scripts and attach Pvr_ExtraSensor scripts to the GameObject that you want to track split controller pose with.
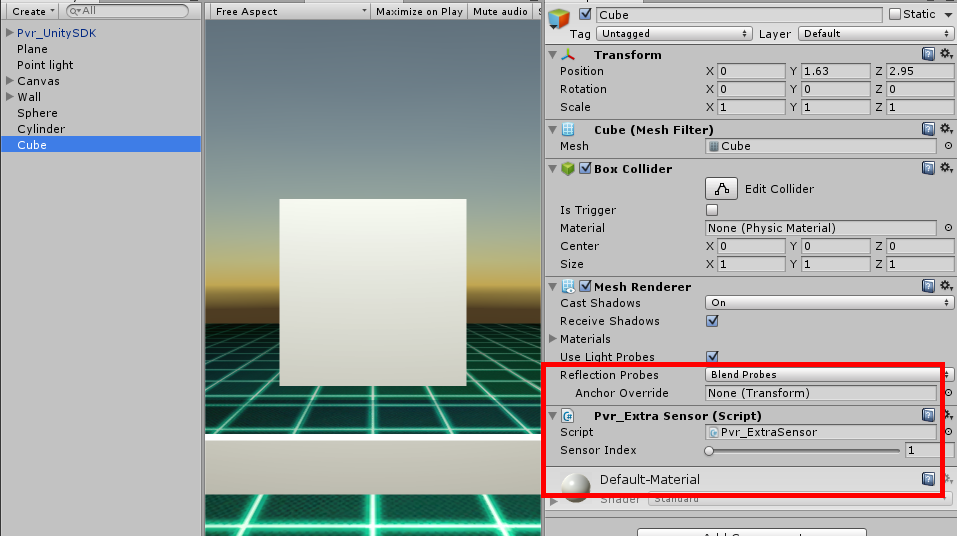
Figure 5.7 Enable Split Controller Pose Tracking
When Neo Controller pose tracking is enabled, the PicoVRManager.SDK.boxQuaternion variable will be updated at real-time. You can read the boxQuaternion variable directly or you can obtain Controller’s pose data with the interface public Quaternion getBoxQuaternion().
5.2.3 Using the Split Controller Keys
The split controller of Pico Neo DK/DKS adopts the game controller’s standard keys and the keys are distributed as follows:
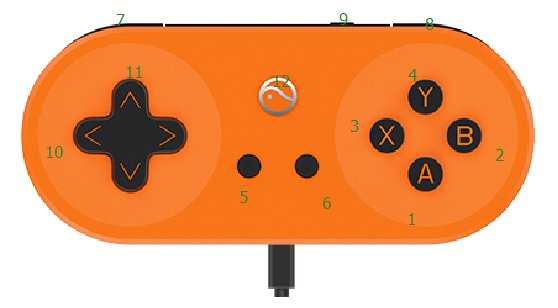
Figure 5.8 Pico Neo DK/DKS Split Controller Key Distribution
Follow the table below to use the key input of split controller:
Table 5.3 The Key value correspondence of Split Controller and Unity
| ID | Key Name | Unity Key Value 1 | Unity Key Value 2 |
|---|---|---|---|
| 1 | A | JoystickButton0 | JoystickButton0 |
| 2 | B | JoystickButton1 | JoystickButton1 |
| 3 | X | JoystickButton2 | JoystickButton2 |
| 4 | Y | JoystickButton3 | JoystickButton3 |
| 5 | Menu | Menu | None |
| 6 | Return | Escape | None |
| 7 | Left Trigger | JoystickButton4 | JoystickButton4 |
| 8 | Right Trigger | JoystickButton5 | JoystickButton5 |
| 9 | Power Supply | None | None |
| 10 | Horizontal Axis | Input.GetAxis(“Mouse X”) | Input.GetAxis(“Horizontal”) |
| 11 | Vertical Axis | Input.GetAxis(“Mouse Y”) | Input.GetAxis(“Vertical”) |
| 12 | Pico | None | None |
Please refer to the image below to configure Unity’s input before use:
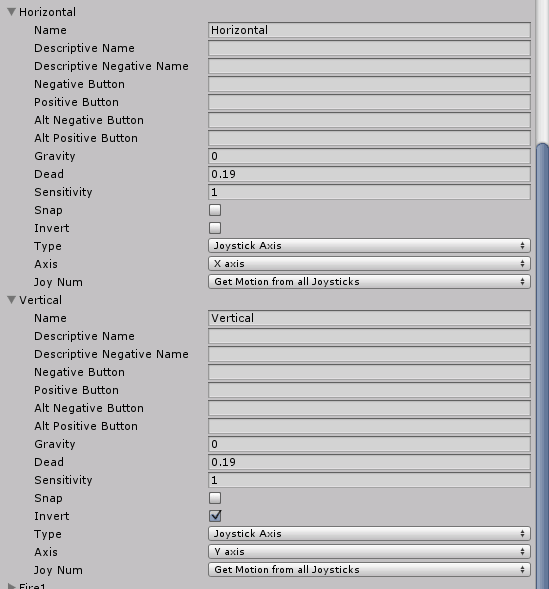
Figure 5.9 Unity Input Settings
5.3 Pico Neo
5.3.1 Implementing Head Tracking and Stereo Rendering
The implementation of head tracking is consistent with the previous SDK QuickStart, just to put Pvr_UnitySDK prefab into the scene. However, there is one thing to note that Pico Neo supports multiple tracking methods. Expand the Pvr_UnitySDK prefab and switch to its details panel:

Figure 5.10 Switch Tracking Options for Pico GoblinS
Head Recenter: When Head Pose is Six Dof, you can only reset position by checking “Six Dof Head Recenter”, otherwise, long press Home key can only reset controller poses.
- Show SafePanel:When Show SafePanel is checked, safe panel will be shown when the game starts.
- Head Pose:
- Three Dof, indicates that head tracking is 3 DOF, tracking only poses, not position;
- Six Dof, indicates that head tracking is 6 DOF, tracking both poses and position.
- Hand Pose:
- Three of, indicates that hand tracking is 3 DOF. It tracks poses, but the position is computed based on the head pose and the data of controller sensor. The tracking scope is limited.
- Six Dof, the hand tracking is 6 DOF. Both poses and positions are tracked.
- Safe Range: namely the safe area, divided into 3 types: Min (with radius of 0.5m), Med (with radius of 1m), And Max (with radius of ∞). There will be area prompts and visual darkening effects beyond safe range.
5.3.2 Using 6dof controller Prefab
Follow the steps below to use 6dof controllers:
- Place CV_Controller0 and CV_Controller1 prefabs under Pvr_UnitySDK, at the same level as Head. See illustration below:
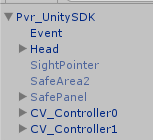
Figure 5.11 6dof Controller Prefab Hierarchy
- Place ControllerManager prefab into the scene, then enter CV_Controller0, CV_Controller1 for Pvr_Controller in ControllerManager, as illustrated below:
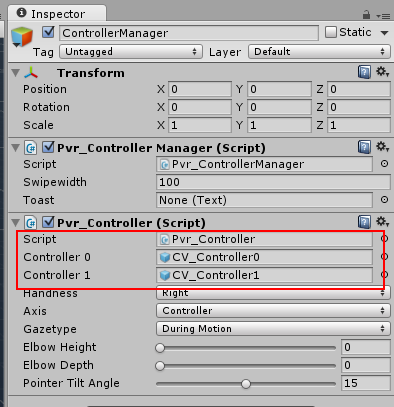
Figure 5.12 ControllerManager Details Panel
To use the controller keys, the interface APIs should be called. Please refer to chapter 6 controller related interfaces for specific API.
Note: We recommend that when you use the motion controller, present the beam and the motion controller in a certain angle, which can increase user comfort and avoid tracking errors caused by blocking ultrasonic modules.
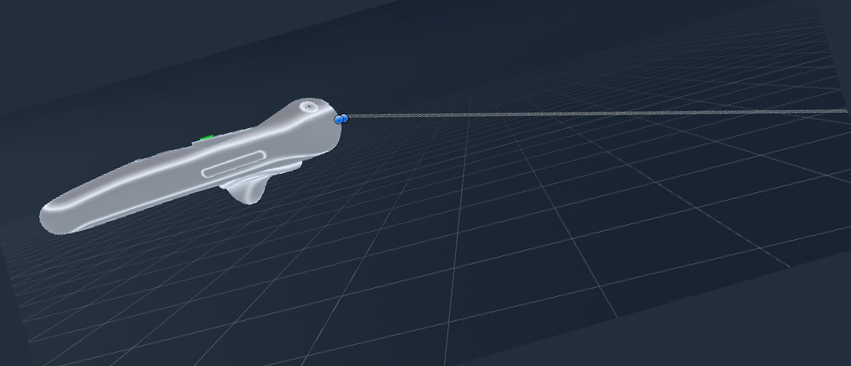
Figure 5.13 Beam Angle Recommendation
5.3.3 Using 6dof Controller Keys and Touchpad
To use 6dof controller keys and touchpad, it’s necessary to call interface APIs as detailed in section 6.3. Here we’ll only introduce the correspondence between interface API parameters and physical controller keys.

Figure 5.14 the Correspondence of 6dof Controller Related API Key Parameters and Physical Keys
In addition, the touchpad is the same as 3dof and it will not be repeated here.